Stage 3 Research

  1. Black Mirror: Bandersnatch

Even before this stage I was heavily influenced by Black Mirrors: Bandersnatch with it’s beautiful cinematography and ground breaking ‘choose your own adventure’ storytelling. With the 5 hours of different footage this is a production on a massive scale, and seeing the average viewing time is from 40 – 90 mins I can then decide from that how much time I’ll need. For example if I wanted the viewer to spend an average of 5 – 10 mins on a pathway I’ll need around roughly 30 mins of original footage. This amount of footage will hopefully eliminate any repeating of paths and will hopefully make every viewing of the audience original each time.

Here is a trailer for Bandersnatch with it’s beautiful cinematography:

As much I would like to film in third person with the beautiful shots like in the featured image above, I feel like I should be shooting everything from a first person POV, by using a DSLR mounted to an actors head. The reason for me doing this is for me to get this amount of footage I need, (which is around 20 minutes) I will need to concentrate on the narrative more than the cinematography. Also in many interactive films on YouTube they all use first person views probably due to this reason.

Here are some other links to other interactive films:

2. ‘Choices’

This film on YouTube is the only other exception when it comes to filming in third person like Bandersnatch, perhaps because this is a fairly big production with 72 minutes worth of independent film and they COULD focus on the camera angles as well as the narrative.

The main thing I got from this film is how at the end of each pathway it pushes a question onto the viewer, “What if Ben’s choices were different?” That follows with a list of alternate answers that the viewer could have picked, toying with the viewer to play again.

Screen Shot 2019-03-19 at 16.09.56Screen Shot 2019-03-19 at 16.10.03.png

3. What would you do? RNLI

This commercial 2016 piece made by the RNLI consists of a series of videos on YouTube that allow you to choose alternate pathways on the topic of safety around bodies of water. The viewer chooses different links in the description, almost exactly like the above film, ‘Choices’. Different to the other films I’ve researched, this one is shot entirely in first person, which is something I will be doing when it comes to creating my own interactive film. Due to this first person view and the lack of narration coming from the main character, it gives the viewer/player a personal experience which is what I strive towards.

It’s hard to talk about the composition of the piece due to its first person view, it has no intentional point of focus, it’s just what someone would see from their eyes. Saying this everything else about the video seems very professional, with acceptable lighting used, stable camera even though its mounted onto an actor, and most importantly the aperture turned up, to avoid blurry foreground and sharp background or vice versa. This has to be done due to the actor constantly pointing their head at many objects at various distances, this high aperture will have a constant sharp image anywhere the camera looks.

The main objective for the creator of this film would obviously be informing a perhaps younger generation on being safe around water and what to do in a bad situation. It will list the wrong decisions you made if you end up drowning in the water, which is another thing I will be doing at the end of my film pathways; listing different decisions they could have madeScreen Shot 2019-03-19 at 16.18.27I believe that this piece of work was ahead of it’s time in 2016 when talking about interactive films, with Bandersnatch sparking a new era of film here in 2019.

Recently I’ve been torn between going with the traditional 3rd person view or the 1st person we see in this video above. To test this I made a really short video comparing the two:

https://drive.google.com/file/d/123MH2_ek7LeVKWk3qc35wnf2iX0x2nno/view?usp=sharing

4. Manage Your Risk/Can you Destroy the Debt?

These 2 videos are very similar in the way they’re filmed, their message, and the tone of the whole individual piece. So I will be covering them as the same piece here. After analysing both of them and playing through each possible route, I noticed many forced pathway decisions, which remove the independence from the viewer by giving false choices that eventually lead to the same path. I’m not very fond on using this is my video but will inevitably have to, due to the amount of footage I’d have to film for every single path/question to lead to a unique scene. Saying this, in the final exhibition many of the viewers wont be playing the game for long and definitely not more than once.

Untitled

Also something I will take into account is that there is a possibility that my Adobe Animate version of my interactive film wont work, and I will have to create a YouTube equivalent, using ‘endscreens’ like seen above in the video ‘Manage Your Risk’.

The main things I will take from this video is the upbeat nature with the serious message at the end of each pathway, something I will incorporate into my project. I will research similar music along with many quirky sound effects that are used in a similar way in these 2 videos. Along with these aspects, I will be shooting everything using a GoPro in first person, which is a similar look to what these 2 videos have.

5. You vs. Wild

Very recently I stumbled across this new interactive film on Netlfix, which after Bandersnatch, are gaining popularity. This very long series is a filmed in third person but with a new feature I haven’t seen; Bear Grylls frequently breaks the fourth wall and asks the viewer what they want to do, in a tone that is directed towards children for sure. This is supported by the fact that he often repeats the questions and answers to the viewers, and also how the interface of how they answer is very colorful and bright.

You-Vs-Wild-Bear-Grylls

The green bars also are a direct copy of the timing system of Bandersnatch, which is something I’ve been struggling with. The aspect I will take from this interactive film is the pure volume of work/footage that is with this series, something that is very important to make sure the viewers have the best experience and the most unique experience as well.


Evaluation and Analysis

Evaluation 1: Camera/Camera Angles

Recently I’ve been experimenting with different camera techniques before starting to record my interactive short film, such as deciding between 3rd and 1st person, and also deciding on either using a DSLR camera, GoPro, or my iPhone camera. Iv’e created recordings and stills for all of these to compared and contrast and then finally come to a conclusion.

Below is a comparison between 3rd and 1st person I shot with my DSLR camera, in this very quickly scripted scene with fake decision making scenes in it:

https://drive.google.com/file/d/123MH2_ek7LeVKWk3qc35wnf2iX0x2nno/view?usp=sharing

With the 3rd person view I believe it would be the best option for the DSLR, but looking at what it looks like in the first person configuration I don’t think it will work very well due to its narrow FOV, and with no access to a wider angle lens it would mean this option is off the table. I would have run into many problems as well seeing as the DSLR is the heaviest camera out of the 3. I would have to create something like this to even make it filmable in first person without using my hands.

This would also mean less convenience to use this in scenes, and convenience is what i’m looking for with the amount of footage I need to get. I’ve also decided that I will be filming in first person and not going 3rd for any scene, seeing as I will not have to worry about camera angles and it will be way more convenient.

So now down to 2 cameras, which are the iPhone and GoPro. Below are stills and video comparisons. I‘m going to be comparing a setting between the two cameras, which is the wide FOV vs the medium FOV on the GoPro, and also the manual exposure vs auto exposure on my iPhone camera:

https://drive.google.com/drive/folders/1TQfKrYuCLhRv4a5Jv1OPimzKLxdxhXvh?usp=sharing

After looking at the videos I’ve come to the conclusion that I’ll be using a GoPro with a Medium FOV because I’d like to keep the traditional camera look and not have a massive fish eye effect, like you get with most action cameras. Iv’e also got a handy mouth mount already for the GoPro, which is known to be the most stable, and best view for a first person film.

With the iPhone it was obvious that it didn’t perform well with adapting to different lighting and as well as how shaky the footage was. Also I would have to create a mount for the phone.

Now that I’ve decided to use a GoPro in third person I will carry on experimenting and hopefully recording the whole film with it.


Evaluation 2: First draft after editing

After finishing the first block of editing and putting a few scenes into YouTube like seen below, it worked perfectly on both YT and Animate, even though Adobe Animate was very difficult to get my head around, even with people to help me.

this is an intsnoze

As seen above the layout is very similar to ‘Can You Destroy the Debt?’ and ‘Manage your Risk’, as seen in my Stage 3 Research.

But even though it worked fine in terms of the very technical side of things, there were many things wrong with the video itself. Firstly the song choice I used was fine, with an upbeat and an ‘elevator-music’ melody, but the only thing that was wrong was that it was very loud at some point. So I will take this into consideration the next time round I edit. Another thing was missing scenes that I hadn’t considered when planning the whole interactive video, but definitely noticed when watching scenes over. Little scenes like the transitions between locations make all the difference on how the viewer interprets the film. I knew from the start that I had to colour grade and colour correct these and now looking back over the first batch of footage I know what I need to correct for there to be a base layer to grade everything. I will go ahead and grade my footage in the near future to match the vibrancy of the films I’ve seen online such as ‘Can You Destroy the Debt?’ and ‘Manage your Risk’.

I will now go ahead and create a second list to complete all these missing scenes along with the other details I’ve covered.

Evaluation 3: Look at the final piece

After finishing my final piece this is what I came up with:

Unfortunately I didn’t manage to create the interactive film through Adobe Animate due to time issues and also the fact that Animate was very difficult to learn. Overall my feelings are mutual towards my piece and I would have many things different if I had the opportunity again.

Stage 3 Final Decision

Interactive Film on Climate Change:

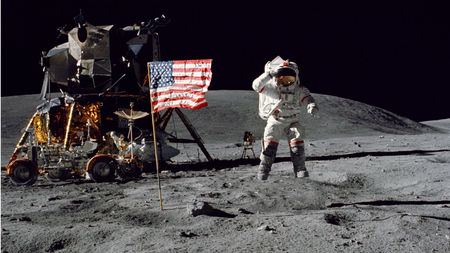
I have yet to give this video a name, but as I have a very deep passion around the concerns of global warming and I also feel like this is a very unique approach to the spread of information surrounding this type of topic, I feel like this is the most appropriate project to do. I didn’t feel very close to the idea of carrying on my Moon documentary, as it’s going against everything I believe. So here are some videos I have found that show the alternate pathways that I will be going for:

What would you do? RNLI

‘Choices’

Manage Your Risk

Can you Destroy the Debt?

The flow chart in the header image above shows the alternate paths of ‘Black Mirrors: Bandersnatch’, which is a spiderweb of paths and endings, which has around 10 hours of footage inside – something that’s near impossible in the time given for Stage 3. I will attempt to go for something similar to one of these YouTube interactive films, which has around 30 mins of footage each. For my early primary research I decided to create flow charts for each one of these 4 videos, to get a grasp of how many paths and what length I should create.

For details of the video I will be attempting to play tricks with the viewers minds, by making them answer irrelevant questions like what clothes they should wear, and then for the next question ask them something life changing. I will also try creating closed loops in the video, so that there are ‘wrong answers’, giving the viewers a false sense of control, but also putting the emphasis on what is ACTUALLY right and wrong when it comes to looking after the planet, for example you SHOULD recycle.

Screen Shot 2019-03-14 at 15.26.10

This is the first choice of the ‘Choices’ Interactive film, where you’d click a decision in the link in the description.

I had an idea of showing all the decisions of the player at the end of a pathway, and guilt tripping them into realising what they’d done wrong – the film above does something similar. Perhaps in the exhibition space I could get a printer to actually print a physical copy of the list for people to take home, maybe like a fridge magnet or something that they always see and always think about.

To confuse the players/viewers even more different questions could have different levels of time for each one, so set a sense of panic in the observers. I will try creating some sort of countdown similar to what Bandersnatch do.

I feel very excited to start this project and I’m eager to learn how I will execute this interactive side.

Stage 2 Research

  1. ‘Conspiracy Theory: Did We Land On The Moon?’

So far I’ve been heavily influenced by introduction clips for films and TV shows, as i’m working on an intro to a television show to do with the conspiracy theory surrounding the moon landing I thought it was appropriate to research into these type of intro’s that show parts or give an insight on what the show will be about. Notable ones include the documentary series, ‘Conspiracy Theory: Did We Land On The Moon’, the introduction to this episode inspires me to use found footage of the Apollo program to show evidence on how the landing were faked (through a non-believers point of view).

hqdefault

I also find the over exaggerated nature of the American documentary series very entertaining and how every little detail is up in your face, not letting you acknowledge anything that’s going on in the intro. The director, John Moffet seems to be a very strong conspiracy believer looking at other work he has done. Unfortunately, none of his other work is relevant to my project but I will 100% be taking the extreme editing into consideration when putting together my piece.

2. ‘True Detective’

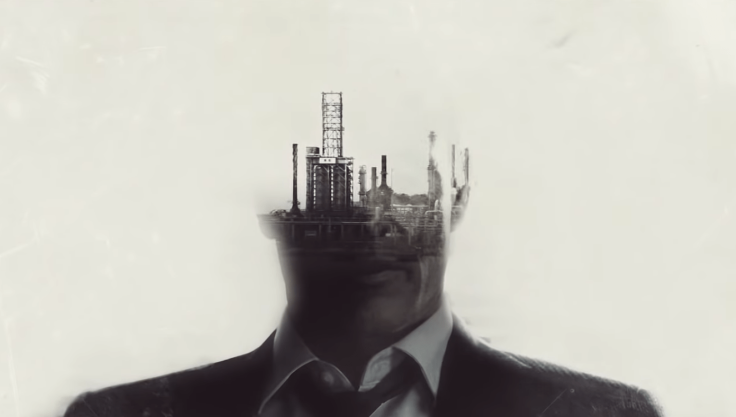
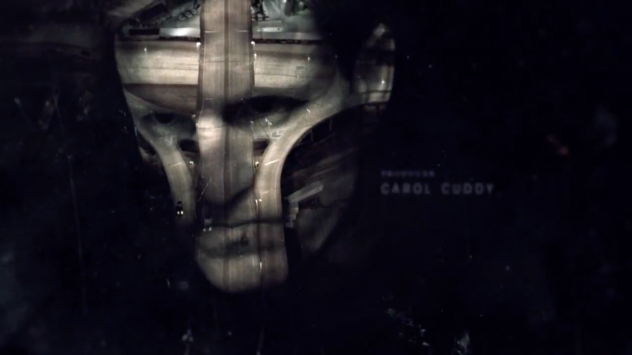
When researching for the ‘Different Point of View’ brief my main inspiration came from the introduction to ‘True Detective’, which is an American anthology crime drama. Even though the show has nothing to do with my idea of a moon landing conspiracy documentary intro. I instantly fell in love with this film sequence as soon as I saw the potential for the use of double exposure in my moon conspiracy intro film. I really believe I could show the different point of view of what people believe happened during the Apollo missions, for example showing the infamous flapping flag on the moon in one shot, and then showing no sign of a blast crater under the ‘Eagle’ spaceship.

Untitled

Audio is another factor I need to consider when creating my piece of cinematography, seeing as its a trailer/intro it’ll need either music or narration. I especially liked the dark-country Western music that played in the ‘True Detective’ intro, but with the type of video I’m going with this gloomy, depressing music might not work too well.

Replicating some of these effects will be near impossible for me to do, but luckily with the use of Adobe After Effects and Premier Pro I may be able to make somethings similar.

Screen Shot 2019-02-11 at 14.30.07.png


3. ‘World War Z’

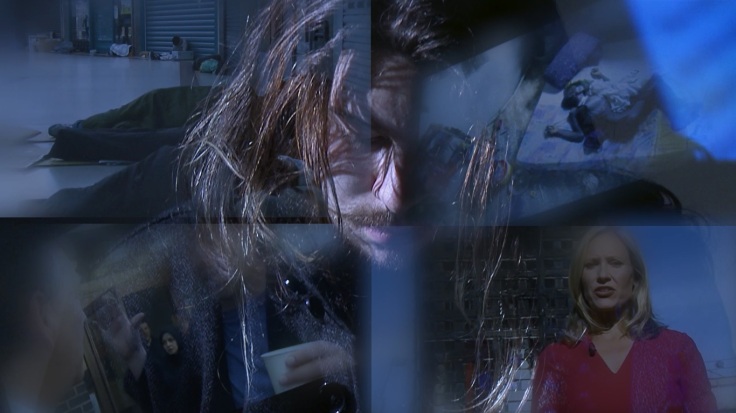
Delving deeper into video manipulation I came across this opening scene/intro for the popular zombie film, ‘World War Z’. Having seen the film the introduction is way more cinematographic and much more artistic. Though there isn’t double exposure at any point during this sequence, most of the footage is not original content produced by the director, but is taken from news shows and television programmes. Seeing as I’m doing my idea on the moon landing and raw footage I will find it difficult to create original content so finding this video is a breath of fresh air now that I know I can comfortably use raw footage from the moon missions.

wwz-e1549901622813.jpg

From what I’ve created so far I believe this piece of content will be my main inspiration due to the fact that some double exposure techniques I have talked about seem to be a lot more difficult to make than I thought. Saying this, I will still be creating simple double exposure effects to en extent. As seen in the image above there is a use of black masking, and also blurred masking, where there’s an enlarged and shifted copy of the footage underneath the original. I will try replicating this technique in my future work. The masks also move and morph in every scene, here’s the intro on YouTube to get a grasp of what I mean.


Having watched this video over a dozen times it’s going to be difficult not to copy some aspects, for example the pacing and the similarities in music. I will hopefully be creating a hybrid video that includes aspects from the ‘True Detective’ intro and this video above.

Photography, Moving Image and Digital Media

During the first couple of weeks of stage 2 we started on our visual communication rota where we learnt the more advanced principles of visual communication, for example the use of aperture in photography, animation with moving image and 3D modelling in digital media.

Photography

So far we during our Monday sessions we’ve had individual tutorial days/discussions with our tutors and also half a day of photography tutorial where we have extended on our photography knowledge. I have found that the class discussions we’ve been having on these Mondays most useful due to the input from not only the tutors, but class mates as well. Also during these sessions we were shown multiple videos including the one below, which has inspired me a considerable amount during my project.


Moving Image

We started by creating animatics on Adobe Premier Pro by quickly story boarding a small story then going out to take the still shots. Here are the photos in order from the animatic ‘Bad Hair day’:

This slideshow requires JavaScript.

Without really considering it before, I will 100% be doing animatics as a part of any moving image piece I will do in the future, as it helps with timing and framing your shots pre-filming.

We later moved onto learning how to control a film camera, and we were split into 2 different groups to produce as much film as we could so we could all independently edit them in the future lessons, here’s a snapshot from the video:

Phone sequence screenshot.jpg

The idea of overlaying the video of the news stories across Ewan’s face came from the workshop exercise we did when we played an already video that we made through a projector onto his face. The message was clear; how some are blinding themselves from the outside world with their phones.

Next was animation, I was actually pleasantly surprised by this workshop session even though my pathway is mainly film, we were taught on keyframes, basic animation in two’s (2 shots of the same frame to make 24fps), and we began to make basic morphing animation where we made a simple 2D circle morph into a 2D square. We then chose what 2 opposites we were going to morph into one another and I decided to literally turn the word ‘chaos’ into ‘order’, here are a few screenshots:

I will definitely be using this type of animation to make a few short clips for my stage 2 brief.

Digital Media

We began our first lessons by brainstorming and getting our ideas down on paper, through writing a 100 iteration piece on our topic, which I found very useful and will be doing this type of brainstorming in the future with new ideas. We looked through a series of D&AD books which I’m confident inspired us all.

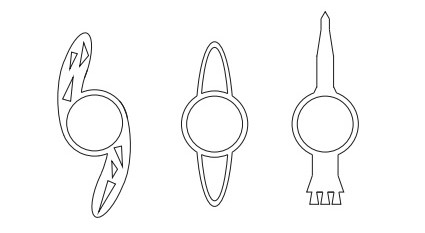
We made simple laser cut ring pieces before Christmas break that we had developed on Adobe Illustrator, here’s an example of what we made:

Laser cut

In the next lesson we took our Illustrator skills and began using a 3D software called Blender, I found these workshops particularly difficult in some areas, especially getting used to the odd 3D modelling softwares. We then put them online for people to view on teh website Sketchfab. Here’s a still 2D image of the 3D scape:

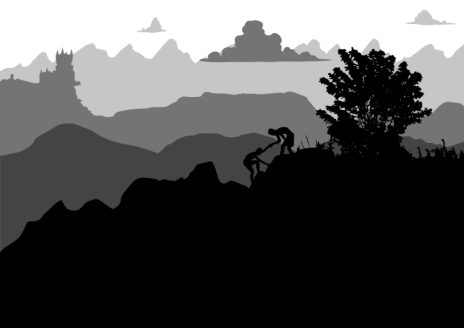
Artboard 1

Each different shade of grey is far away from each other in comparison to the front image with the two silhouettes.

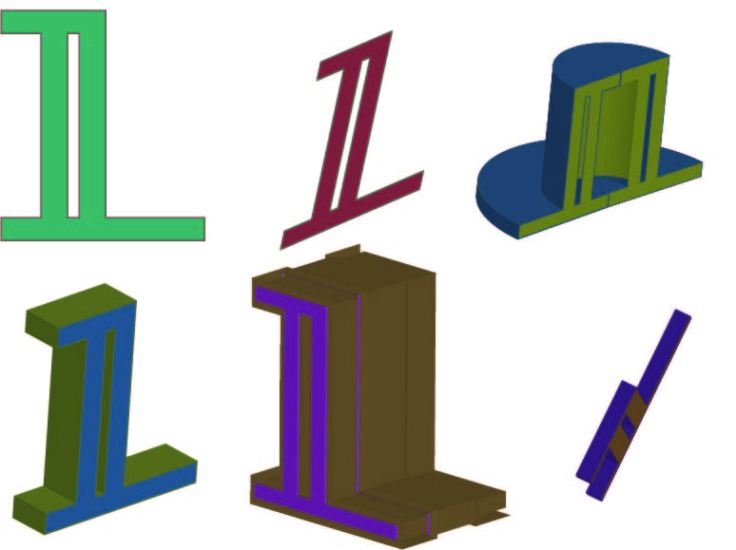
Overall in our digital media workshops we learnt about how to use Adobe Illustrator properly through learning how to manually trace, live paint and give objects a fake 3D look. Here are some examples of that work:

IL 3D illustrator


Major Project (Stage 3): Initial Ideas

Idea 1: The Consequences of Climate Change

Genres: Film, Interactive Film, Game Art/Design, Experimental Film

Practitioners: I will be researching into Black Mirror: Bandersnatch to understand how vast a multiple choice film could be.

Also a series of videos the Royal National Lifeboat Institution created to inform and educate people on how to save a life. ‘RNLI: What would you do?’

Lastly, ”Choices’ – An Interactive Short Film” which I will also be looking at.

Ideas: Making a multiple choice video/game online on YouTube or through DVD [so that the viewers can choose easier] but also tricking the viewers by making them answer questions that don’t matter, like what cereal you eat that day.

Techniques: Learning how to program a DVD or code multiple choices into a video.


sf-conspiracy

Idea 2: Carry on my documentary on the moon landing

Genres: Film, Experimental Film

Practitioners: I will be looking back at some videos and documentaries that I researched in stage 2, and one of them will be ‘Conspiracy Theory: Did We Land on the Moon’.

Also some past programmes like ‘The Mythbusters: Was the Moonlanding Faked?’

Lastly for my second idea I will be looking at other sort of specifically, experimental and more documentary film making.

Ideas: To create a documentary on the moon landing, but with a twist; it tries convincing viewers to believe that the moon landing DIDNT happen, and making the believers look stupid.

Techniques: Over-the top video editing techniques like most American documentaries are like.


In later posts I will decide out of my ideas on which I will carry on to do in the next 10 weeks.

‘Another Point of View’ (Stage 2)

A first look/initial ideas

When we were given the ‘Another point of view’ brief on the 10th of December it seemed very unclear on what was needed to be done, and how we were going to do it through visual communication. Initially we all thought it was from the literal different point of view, for example the point of view from a horse when it’s about to be shot by its owner, like happens often. Turns out it’s more of an empathetic understanding of someone else’ point of view, e.g. people who believe we didn’t go to the moon. I had 3 main ideas, which was:

  1. The perception of death through different religions
  2. The perception of the real world/work through the eyes of school dropouts
  3. The perception of various conspiracy theories through non-believers eyes
  4. Media corruption and how it is seen as acceptable by some

Image result for dropouts vs graduates: is college worth it

In later posts I will decide which one I will pick by researching deeper into each individual topic. Some early inspiration came from a YouTube channel that gets people together who have opposing beliefs and then they attempt to come to a middle ground in their beliefs.


Stage 1 Research

Tripoli Cancelled (2017) – Naeem Mohaiemen

Seeing this film for the first time in Tate Britain I felt instantly inspired by the still shots and use of colour. While making my ‘This is Not a Video’ video (which will be released shortly) I considered the stillness of my shots and also the use of colour in them, where in the boring shots I used a black and white colour pallet to make the shot miserable and then also when an exciting scene surfaces I’ve saturated and made the film look much more vibrant, like in the scenes from Tripoli Cancelled where the orange sunset contrasts with blue shadows.


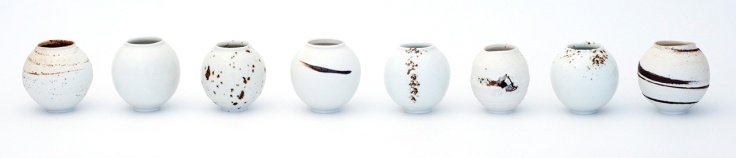
Moon Jar – Adam Buick

adam-buick-moon-jars

Straight away after seeing Adam Buick’s work in the ceramics workshops I was instantly inspired to make something similar. And typically before I knew the name of this project I thought they looked like moons. So that’s what I did; I created 4 Jovian moons for my stop motion: ‘A Galilean Adventure’. I was particularly inspired to make Jupiters moon, Europa, that has the same sort of cracked pattern and colour as Adam’s work.


Printmaking, UCAS and Photography – Rota 3

Printmaking

During our printmaking lessons we learnt how to make monoprints and we spent most of the first week just experimenting with patterns and printing our objects with black inc. Moving on to the second week we were told to create these collagraph images before the lesson based off our objects, so we did, and here’s what I created:

These two were based off the patterns seen on my rusty connecting rod (left) and the cracks on an old iPhone (right). Instead of creating random patterns and shapes onto a collagraph I decided I would implement these shapes onto globular pieces, much like a planeto or a moon. This is something that has definitely influenced my work during my individual studio time and other projects such as my planetary stop motion. Here’s how the collagraphs turned out:

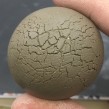
IMG-1174.JPG Here I decided to use a different colour rather than black, as I thought this particular colour, combined with the shattered glass pattern makes a print very similar to Europa, one of Jupiters moons. I’ve found myself stumbling over this pattern many times in my work, for example during our ceramic lessons. I find it particularly intriguing on how the cracks are formed and perhaps I can do something to ‘fix’ the cracks in my future work.

During our third week of print we were asked to make collagraphs again, but this time with some stencil details within them, and here’s what I came up with:

IMG-1271.jpg

This is actually the finished print on a piece of paper, where you can clearly see where the stencil was cut out, in the shape of a garden fork. Again, I wanted to relate it back to a spherical object, such as a planet like this one. I imaged the swirling and stripey clouds to look something similar to this, and I believe the addition of the forks are effective in presenting the randomness of the cloudtops like some may want to call them.

UCAS

During our UCAS lessons I was pleasantly surprised by what they turned out to be, as I thought it would have been a very formative couple lessons. I feel like it should perhaps be called ‘Personal development’ sessions that happen to guide us through the UCAS process. Nevertheless we were guided through the process of setting up a UCAS account, but I feel deeply affected by the first lesson we had, which was very much a personal reflection/development session where we actually considered and discussed our future life choices and what makes us happy and complete. This was very useful to me seeing as I wasn’t considering this course less than a year ago and I’m going to have to make similar choices in the near future.

Photography

In the first week of our photography classes we were taught on how to take regular pictures with DSLR camera’s, experimenting with long shutter speed and studio lighting in 3 groups, here are some examples:

Here we experimented with contrasting colours through portraits, and I enjoy these images very much due do their effective contrast. We also experimented with overlaying images on top of each other by using the camera instead of doing it in post production.

In the second week we ventured into the dark room to process images inside, this fascinated me very much and I have used it since to create small story boards in my zines and in other pieces of art, here are some examples inside the zine:

IMG-1419.jpg

I created this by drawing on top of acetate and then taking two images, one with the army figures in the scene and one without.

On the last week we created zines which I loved, I really enjoyed how expressive they were in such a small, compact and readable space. Here’s the zine:

Here’s a small storyboard from the inside cover (right) and also the front and rear cover (left). Overall I enjoyed this rota a fair amount mainly while doing the photography, seeing as this is down my street of lens based media.

Ceramics, Sculpture and Digital Media – Rota 2

After completing the first 3 weeks of our academic year we began on our second rota, which consisted of ceramics, sculpture and digital media studies. We still had tutorials on Mondays, ceramics on Tuesdays (and one more ceramic lesson after the Halloween reading week), sculpture on Wednesdays and then contextual studies on the Friday.

Now that our Tuesday self directed studies where now switched to ceramics, I had to manage my time more effectively now that I will miss 5 hours of project work, saying this I much rather have a discipline based day than a self directed one. I found it to be more advantageous in the sense that I have now got more of an understanding of ceramic based work and also now I have more of an artistic mind and portfolio.

Ceramics

Instantly from the first day when watching the power point our ceramics teacher showed us some of Adam Buick’s ceramic work to us, and immediately reminded me of planets and moons that are out there in space. Particularly Europa, a moon of Jupiter. I was also inspired to create Europa while I was aimlessly rolling a piece of clay in my hand, this was the outcome:

IMG_0475.JPGI was very intrigued by the outcome and wanted to explore it more and how the cracks formed. I enjoyed this look because it gives a natural look on how the cracks form, instead of imitating them. Below are some of Adam Buick’s ceramic work and you can clearly see how his work inspired me with the planet – looking patterns on them:
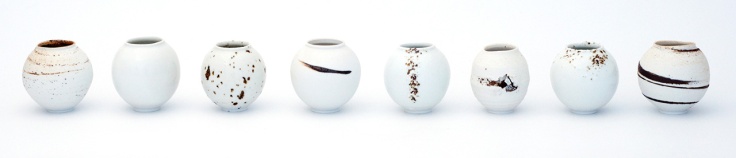
adam-buick-moon-jars

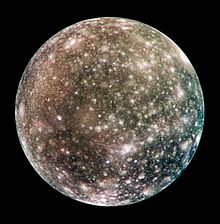
So after sketching and thinking of ideas about what I was going to do I decided to create the moons of Jupiter through ceramics and then to glaze them. After messing around with the clay and also learning on what my boundaries of creating were I soon realized I was not going to have enough time to create 4 separate sized moons in the 3 days of ceramics that I we had. So instead I would create one out of ceramics, one out of plaster, and two out of paper mache. I will then place them on the ground orbiting a ‘fixed’ point, they will all be revolving around at different speeds and distances. I will show this by using stop motion and perhaps give it more life by adding one of my objects to the system, and letting it travel from moon to moon. If I could do something differently it would be to create something expendable to fire and glaze during the first week so I could experiment different colours, glazes, etc. During the second week, I started making my sphere that I decided was going to be Callisto, Jupiters second largest moon.

Callisto

I decided to create this particular moon because I believed the bright craters would be interesting to ‘fix’ onto the surface with some sort of white glaze. I also believed that it would be the most suitable scale seeing a choosing one of the smaller moons would be increasingly difficult to make. I started by creating 2 identical half spheroids that I made with a plaster mold I found. I would then make some slip, which is very ‘pasty’ clay that would help bind the 2 half spheroids together. After making some finishing touches it was ready to be fired so I could start painting next week.

The following week we started off by researching different colour glazes, for example Manganese oxide, which gives a brown/red/blackish look to your work. I though that this compound would be suitable as a base coat due to the brownish hints in the surface of the moon; but I was very wrong. I seemed to underestimate how red it would actually be, and it turned out like this:

IMG_1062[1]

As you can see this looks nothing like what I imagined it would look like, so I will now paint over it in acrylic paint, (which is a risk I’m willing to take) to attempt to make it more realistic looking. To finish my Jovian system for my stop motion video I will now go ahead and create the 2 paper mache moons, and then the single moon in sculpture. Reflecting back at this experience I wish I could have made 4 globes that were different sizes and maybe I could have done that by creating 3 more plaster molds so then I can create 4 solid, ceramic moons. What I would have loved to know more about is how the paint and glaze would actually turn out on my ceramic piece due to this globe being a total flop of a colour.

Sculpture

Looking back at my time in sculpture we basically did the same in the first day as we did in ceramics; which was messing about and learning how to work with plaster and sculpting clay. We sculpted our objects and also vacuum formed some of them, then filling the plastic form with plaster to get an accurate replica of the object.

We were later told in the next week to start constructing a utopian world where we could display our objects and ‘fix’ all the molds together. I decided to create a piece of architecture that could be ‘fixed’ in many different ways to make many different utopian buildings. I used and molded many of my objects to make structures such as this:

I was going for a 1:100 scale futuristic mansion type of building with a ‘hand’ water feature, a ‘connecting rod’ hot tub, and many other details that resemble my objects. I used many sculpting techniques to create this but still believe that I should used ‘Mod Roc’ to maybe secure my sculpture together, but it may have defeated its purpose and restricted the way you can ‘fix’ different parts to it and ‘fix’ it into different shapes.

Digital Media

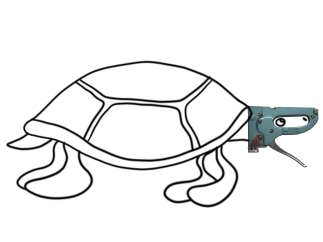
During our digital media lessons we created many different pieces of art through using Photoshop as seen in the blog featured image above, we started through learning basic controls for the Apple Mac and after we (sort of) got a grasp of that we started working on Wacom tablets to create things such as this:

turtle

It was essentially creating anything from our abandoned objects or any objects we could find really. I enjoyed this due to the fact that I find it interesting how everyday objects can be manipulated into looking like strange and abstract pieces of art. I’ll probably look upon this technique again in the near future by using Photoshop to manipulate an image; as I’m going into the Visual Communication side of things.

Next week we started on using Photoshop a little bit more professionally by learning how to apply text and manipulating it to look how you want. We were also taught on how to add multiple layers and different effects to make very abstract and sometimes messy pictures. Nevertheless I relished in this practice just because I love learning new things when it comes to Photoshop and other digital software.

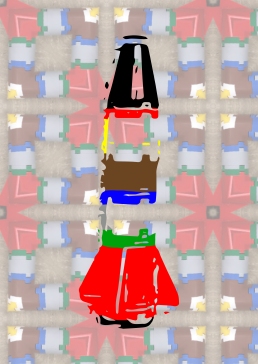
During the last week we started integrating our phones with Photoshop to help us in our studies. We did this by downloading ‘Adobe Capture’ onto our phones so we could take multiple different images, shapes and patterns like in the image below:colourful rocket.jpg

I enjoyed doing these very orderly images and I like how graphical they look; even though they’re real life objects. The featured image that is used above near the title was also created using the same techniques. I will most definitely be touching upon these processes again in the future seeing as I’m going down the digital media route.

Concluding what I’ve learned in the past 3 weeks during our second rota I would say the most important thing to take away from these disciplines is how important it is to have knowledge in multiple aspects of art and how its always important to have more of an understanding so the different aspects of art can aid other aspects of art.

Create a free website or blog at WordPress.com.

Up ↑

Design a site like this with WordPress.com
Get started